
Having to stay inside can get dull—especially if it’s too cold, too windy, or too rainy to play outside. I find myself staring out my window quite a lot these days. It got me thinking: what could make my window more fun? How could I make my indoors more colorful while also sharing some fun with my neighbors, who may be looking out their windows? For our first at-home art activity, I drew inspiration from leaded stained glass windows!
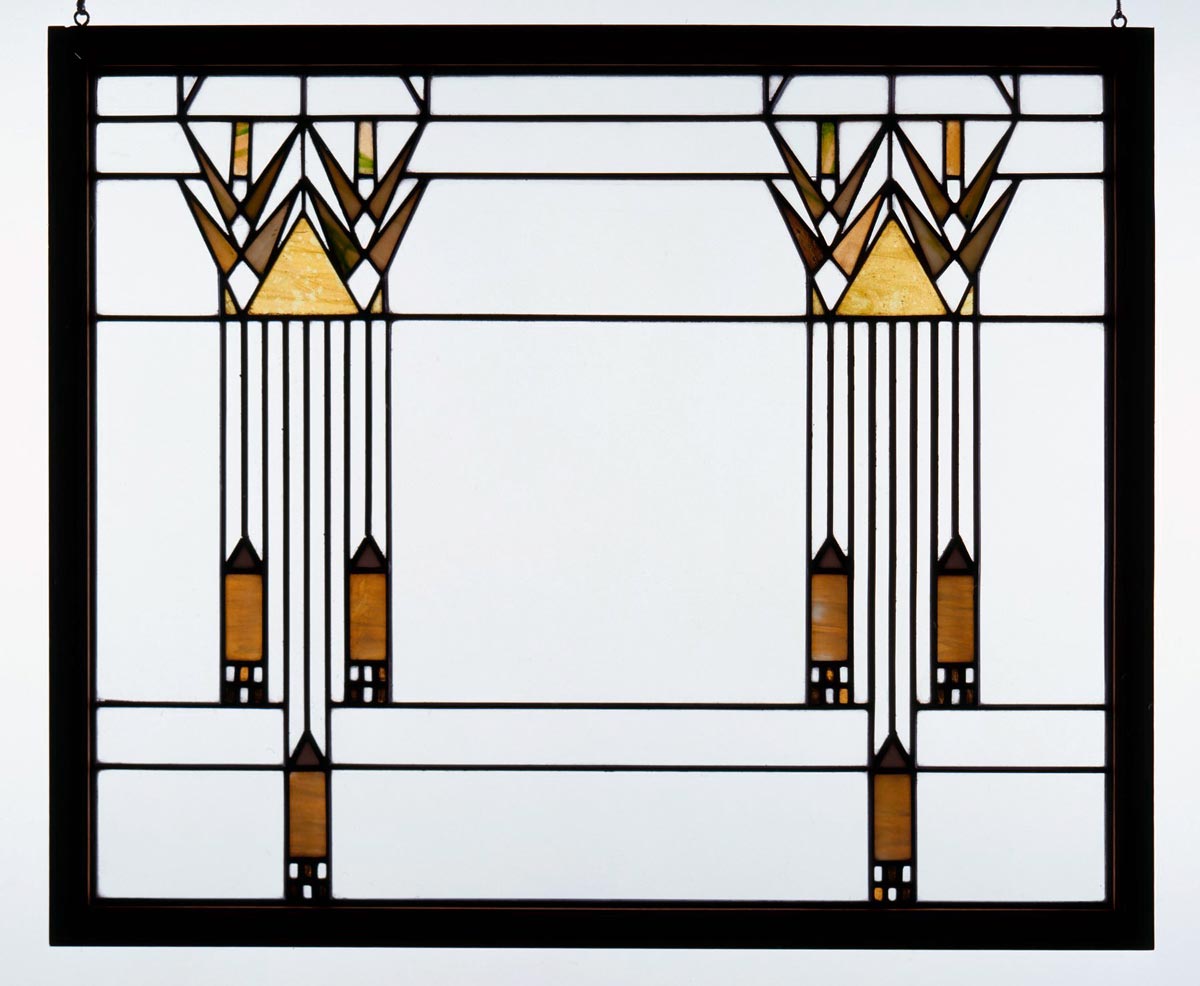
This window, which is now in the Museum’s Collection, was designed by Marion Mahony Griffin for a farmhouse she renovated for her brother’s family. To create the window, stained glass (or colored glass) of different colors and textures was cut into shapes to match Griffin’s design. The glass pieces are held together with lead strips, or leading, that get placed in between and around each glass shape.
Now let’s create our own stained glass window! You can use found materials for the “glass” and tape for the “leading” to hold the design together. Start by collecting translucent materials from around your house. Translucent means the material will let some light through, but it is not completely clear. For example: the lenses in sunglasses are translucent. Kids—make sure you ask a grown-up first if the materials are OK to make into art. Here’s what I collected:

- a plain sheet of computer printer paper
- an old catalogue, turned to my favorite page with TONS of candy!
- tissue paper I unwrapped from a gift I recently received (Can you guess which holiday the gift was from based on the colors?)
- a few colorful envelopes
- a clean, unused napkin that came with plasticware from my local delivery restaurant
- a clear, plastic bakery container (Have a grown-up help you cut flat pieces from these containers; the edges can be sharp and pointy.)
What kinds of materials did you find? Share with us in the comments!
Next, test your materials. See which of the materials you collected are actually translucent. Hold them up to a bright window or a light to see if you can almost see through them. If you like the way it looks, use it!
Before you move on, make sure you are wearing clothes you can get messy in and have a space to work where you can make a bit of a mess.
As you can see in the picture, my computer paper, napkin, and clear bakery container are still kind of dull. Let’s color them! Coffee filters are also a lot of fun to paint and color on, if you have them. I bet you will find great translucent materials that I didn’t even think of. I’d love to see what you discover!

Watercolor paints, markers, and highlighters work well on paper materials. I’ll have to use permanent markers on the clear plastic. Since all my tissue paper is red and pink (warm colors), I am going to use cool colors for this step. Can you name some cool colors? Hint: all of the markers in the photograph are cool. You can choose any colors you like!


Much better! I used watercolor on the computer printer paper, permanent marker on the clear plastic, and markers and highlighters on the napkin because it was too thin to paint on.
Next, make your shapes. May I recommend tangrams? Tangrams can fit together in many ways. Here is my tangram layout.

You can print and cut this one out to use as a template or tracing tool—or you can draw your own tangram shapes. Learn how here.

Next, trace your tangram shapes onto the translucent materials that you’ve prepared. They can fit many different ways.
And now it’s time to cut your translucent tangram shapes! Make sure you have a grown-up to help you with the scissors. You may find that some materials are easier or more difficult to cut. Parents and guardians—this is a great opportunity to talk about thick and thin, hard and soft, and textures like smooth and crinkly.
Once you have your translucent pieces cut and ready, you can start creating a pattern (a repeating arrangement of colors and/or shapes). You can also use your pieces to make a picture—it’s your choice! When you have a design you like, you are ready to attach it to your window.

NOTE: Make sure your windows are closed and locked safely and securely before working on them. Check to be sure the glass is not loose in its frame. Safety first!
Not all windows are the same. This project works best on a glass window that can be easily cleaned. You can tell if a window is glass by gently tapping it. It will feel harder and the tap will sound higher than plastic. Compare it to drinking glasses you have that are glass and plastic. You can use many different kinds of tape on a glass window.

I have electrical tape, masking tape, brown packing tape, and invisible gift wrapping tape. The longer the tape stays on a window, the more difficult it will be to remove. I have had masking tape on a glass window for over a year. It came off, but it required some scrubbing. For this project, I will use the black electrical tape and masking tape.
I start by taping around the edges of my first shape, making sure to leave enough of the sticky side of the tape exposed to attach my next shapes. Leave enough of the sticky side exposed to attach the whole design to your window. You can also tape each shape directly to the window. Do what works best for you! I will do both. Here’s how the front and back of my design look with the tape applied:


When you have a few pieces together, you can start attaching them to your window!


Here’s where I’m stopping for the day:

And how it looks from the outside:

Your design can grow and grow! Take time each day to add an extra shape or two. After you add a shape, see how many other things in your house share the same shape. Your “stained glass” window will look different throughout the day and night. Check back in every so often and notice the changes. Is your material changing? What could make it look different each time?

You can also have tons of fun with leftover shapes. There are many fun tangram puzzles you can find online to use with your new shapes.

Don’t forget to share what you’ve made with us! Check in next week for a new project to do from home.
Kohl’s Studio at Home activities are designed to be enjoyed with the whole family, regardless of age. Families can work together to learn new techniques and materials, and to explore creativity. As with all new things, provide your child the support and supervision that they need for their developmental level, practicing safe use of tools and materials. You know your kids best!

Brett Henzig is the Youth & Family Programs Educator. He manages the Kohl’s Art Studio, leads school tour workshops, and teaches Youth Studio Classes and Summer Art Camps. Outside the Museum, you’ll find Brett making art, rescuing injured wild animals, and spending time with his wife, son, dog, cat, and rabbit.
One reply on “Kohl’s Art Generation Studio at Home: DIY “Stained Glass” Windows”
Very good idea. Also, If you have two sheets of black paper or construction paper ? Map out your design with half inch space between the tangrams. Use your tangram patten to trace on your painted tissue and assorted papers. When you cut them off leave a one fourth inch border around the edges to glue them down on your prepared cut out tangram design on black paper.
When all are in place take the second sheet of black paper that was cut out along with the first sheet. Apply glue to one side of the black cut out paper and then line it up with the first black sheet to cover the back side. NOW you can view your tangram pattern from the inside what the people outside are viewing on your window.